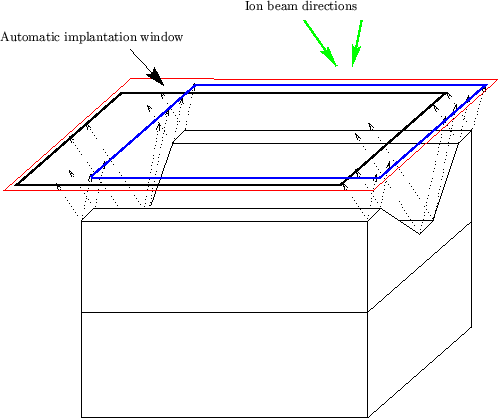
When performing the ion implantation simulation a lot of ions are started from within an implantation window laying in a plane somewhat above the surface of the simulation domain. This implantation window can either be set by the user or is determined automatically by projecting the surface of the simulation domain into the plane of the implantation window. The direction of projection is the direction of incidence of the implanted ions. If multiple implantations are simulated (Sec. 4.5.4) projections in all directions of incidence are performed as indicated in Fig. 4.2. The dotted arrows denote the direction of projection. The arrows are anti-parallel to the ion beam directions. In the example shown in Fig. 4.2 two ion beam directions are used during the implantation. The automatic implantation window is the smallest rectangle that contains all surface points in the plane of projection as indicated also in Fig. 4.2 by the large red window, while the black and the blue window were the implantation windows if just one ion beam direction was used.
![]()
![]()
![]()
![]() Previous: 4.1 Geometry Expansion
Up: 4. Monte-Carlo Simulation with
Next: 4.3 Initial Conditions
Previous: 4.1 Geometry Expansion
Up: 4. Monte-Carlo Simulation with
Next: 4.3 Initial Conditions